Monday, March 31, 2008
Transplanting Tomatoes
I have some Santalina F2's from the grocery store (don't ask - an experiment) that I've been growing for about a month or so, high up on a shelf in my south facing window, who were definitely on the waiting list for a transplant. I am a bit quicker than the health care system apparently! In this picture, you can see the roots growing out of the peat pellets I grew them in. I don't usually use peat pellets, I use the cell trays and soil, but these were cute little six pellet domed greenhouse trays, for a buck. I couldn't resist, and I have to say, I rather liked them. They worked well, and the plants certainly didn't complain. All six seeds germinated, and grew into fairly sturdy little plants in almost no time. I think I'll be on the look out for more peat pellets at garage sales and such this summer. They are a bit pricey when you buy them at Canadian Tire, or gardening supply stores.
For potting them up into bigger pots, I removed the cotyledons and placed the whole pellet at the very bottom of the pot. Then I simply filled it up with my soil, watered it, added a little more soil to the top. With peat pots, it's actually a good idea to remove as much of the pot as you can, because they just don't break down fast enough, and I also find they tend to dry out very quickly, but with the pellets, I don't see any problems just potting them right up. The roots have obviously worked their way through the mesh that holds the pellet together. Tomatoes will grow additional roots along the stem that is buried, so the theory is that this will actually give you a stronger root system. When you are planting them out in the garden, planting deep or trenching will do the same thing. The only concern when deep planting outdoors is that the soil need to be warmed up enough, as tomatoes do not like the cold. Trenching works by digging a shallow trench, and planting on a slant in the warmer top soil. It doesn't take tomatoes long to straighten out as they reach for the sun.
When transplanting from the cell, you need to be slightly gentler, as you don't want to disturb the root system too much when you are removing the tomato. I kind of squeeze it out from the bottom by pushing it upwards, trying to avoid handling the stem too much because it is very easily damaged, and then plant it basically the same way as I do with the pelleted tomato. Depending upon how long they will be in the new pot (usually they are only moved up to a 4 inch pot), I may give them a bit of fertilizer a week or so after transplanting. If I am potting them up for sale, then I may pot them up once more, in a slightly bigger one, in a few weeks, or if I am going to be growing in containers, I will generally pot those ones up to a bigger pot as well, before they go into the final big pot. Fish emulsion is a great organic fertilizer, I use one called Muskie, that I found at Canadian Tire, on sale at half price.
Thursday, March 27, 2008
A Tomato
Just a few things I forgot to post earlier.
Almost anything can be used for seed starting. Inside this old strawberry container are some Sweet Basil seeds, just sprinkled on the top of the soil, as they need light for germination. And obviously you need basil to go with tomatoes. Especially if you like "Summer in a Bowl", which is absolutely scrumptious, any way you make it.
Galina, after her haircut. I'm not a wasteful gardener, (have I mentioned my packrat tendencies yet??) so I dipped the little side shoots that I pruned off in a bit of No.1 rooting hormone, and potted them up. Tomatoes root very easily, so I should have another 7 little Galinas in a short while if all goes well. I didn't have anything that remotely resembles a greenhouse dome cover that would fit over the cuttings, so we'll see how well the cuttings do. I may try to improvise something (such as cleaned out milk bags held up with popsickle sticks - motherhood being the necessity of invention, and all! or in this case, would you call it planthood? There's a topic in itself, Planned Planthood - I am severely lacking in plant control, apparently!
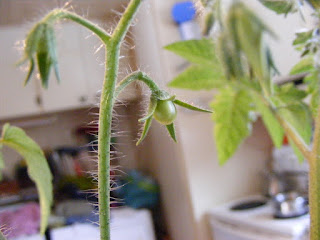
Galina, with her flowers. Notice that tiny little green egg shaped thing in the background.
A tomato!!! My daughter, Meg (5), the affirmed tomato junkie of the house, called dibs already! Sorry!!!
Lift Off!
Here is a tiny little 'Moskovitch' just popping its head out. If you are patient (or crazy? or have way too much time on your hands!!) you can literally watch it unfold.
It didn't take long at all, from the day of my snooping to this morning, for these little tomatoes to sprout. I really need to get my shoplight out, and set up. These babies are already reaching for the light!
Eggplant Seedling:
This is the same eggplant that I showed in an earlier picture, with good strong true leaves. A little bit of sun goes a long way. And notice how it is growing straight now. I turned the trays around so they would straighten out a bit.
And in case anyone wants to see a lovely picture of aphids:
And the final picture of the day:
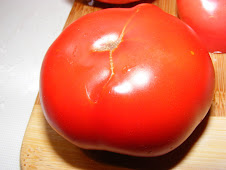
For 20 points, can you guess what this is?
Tuesday, March 25, 2008
Being a Snoop
Are you a snoopy person? When it comes to my plants, I am. I do all sorts of things that I know I am not supposed to. But how else can you tell if your seeds are germinating, if you don't poke around? How else can you tell what the root system your brug is looking like, if you don't pull the plant out of the pot, and poke around? I do realize if I would only show a little patience, then I'd see proof positive of seed germination - as in the little tomato heads. Patience may be a virtue, but it ain't one of mine.
And if I didn't go snooping around, I wouldn't have this picture of this tiny little seedling emerging to share. That little brown thing with the white tail in the middle of the picture is a baby 'Bloody Butcher'. And yes, I am growing them partly because of the name, but they are also supposed to be a pretty good tomato. An early (50 - 60 days), high yeilding, potato leaf indeterminate that produces 4-6 oz tomatoes. We'll see if it lives up to its reputation in my garden this summer.
I also have a Cherokee Purple just poking its nose out, and a few others. That's right on track, as most of these trays of seeds were sown 3 to 5 days ago. Still have many more flats to do, and I need to drag in another greenhouse shelf unit from my shed, to accommodate them.
I am toying with the idea of wintersowing some as well. I had never tried it until this year (some hosta seeds), but I've heard very good things about the method. That would be an interesting comparison to make between my indoor starts, and outdoor wintersown ones. There is an excellent website, Wintersown, for some excellent pointers. I came across a small container of tomato seed the other day, that has no label, and of course I have absolutely no idea what they are! Remember what I said about labeling your seeds?? I do know that I wanted to save them, just not what they are, so they would make a good sacrificial seed to the wintersowing project.
My list of what's been planted so far:
- Zigan
- Silvery Fir Tree
- Bloody Butcher
- Moscovitch
- Brandywine (Sudduth)
- Japanese Black Trifele
- Pruden's Purple
- Cherokee Purple
- Kellogg's Breakfast
- Pink Brandywine
- Pineapple
- Mortgage Lifter
- Neves Azorean Red
- Black from Tula
- Vova Yellow
- Orange Jubilee
- Palmira's Italian Heirloon
- Rhoades Heirloom
- Moscow Suburb
- Siberian
- Blue
Sunday, March 23, 2008
Step by Step Seed Starting
I have finally started seeding in earnest. I'm still waiting for a few things in the mail, but at the rate I seed, they'll be here long before I'm done the ones I still have yet to plant.
I worry about what I post sometimes. I wonder if I am being clear enough, if I post too many pictures, or if I'm too wordy, and don't post enough pictures. Looking at other gardening blogs that I like to read, I realized the pictures are half the post. And the pictures make the post.
So I took pictures of my seeding process, step by step, in the hopes that it will clarify anything that I unwittingly omit. For many, this is old hat.
A while ago, a bunch of parents, at a playgroup that my daughter and I frequent, were discussing general gardening and gardening with kids, and as the admitted gardening junkie, they asked my opinions and ideas on a few things. (At least that's my story!!) One of my recommendations was to grow beans and peas with kids, because they can actually see the germination process in action. One of my friends asked about bean seeds. Well, I have a variety of beans at home, so I offered to bring some in for her. No, no, she said, I want to try the seeds. Uhm, bean seeds?? The beans are the seed, I told her. Ooohhh!!! You could see the comprehension dawning on her face. She doesn't garden much! I am not making fun of her, I am only trying to point out (in a humorous way) the disconnect many people have between their food, and the production of said food. I am sure she is not the only one.
Preparation:
I have my bucket of soil mix, my tray, my seed packets and my trusty notebook.
The next step is to fill up the trays, with the mix. I do not pre-moisten, I put it in dry, and lightly water once they are filled up.
Now I carefully place one seed in the middle of each cell. If you have older seed, you may want to use two or three seeds, just in case one doesn't germinate. If you have a limited amount of seed, one will do. Any cells that don't have a seedling germinate, you can always replant with a new seed in a week or so.
That little white round thing in the middle is a tomato seed.
Now I take about a third of a tablespoon of mix, and sprinkle it over the whole area so it just covers the seed.
Then I use my trusty spray bottle to moisten that top sprinkling of soil, which ensures the seed comes in contact with the water and the soil and doesn't get moved around too much .
I label each section as I go, or if I'm doing a hodge podge of different tomatoes, each cell. Sound simplistic, but you wouldn't believe how easy it is to forget what you just planted, especially if you are planning three steps ahead.
I use popsickle sticks or coffee stir sticks, broken in half to write in the variety. I also make a note in my little notebook, just in case.
Now it's ready for the dome lid, onto the shelf, and wait for the seedlings to pop out.
This is what you are hoping for in a few weeks or so:
Notice the lower baby leaves (the cotyledons, not true leaves) are yellowing a bit. These plants are in need of transplanting into a 4 inch pot, and a shot of fertilizer. The roots are growing right out of these peat pellets. They aren't too leggy though, because they have been up high in my window, getting lots of sun. So they are still looking pretty good. I will transplant soon, and give them a shot of Muskie (fish emulsion fertilizer) a few days or a week after transplanting. When I do transplant, I will plant them deep, stripping off the cotyledons if they have not already fallen off, and planting up to the first set of true leaves.
Here is a pic of an eggplant seedling, clearly showing the cotyledons, and the very beginning of the first true leaves.
Here is a picture of some eggplant seedlings, that have recently germinated. They are much slower than tomatoes. In fact, they were started the same day the above tomatoes were started. Notice too how they are curving to one side. This is photo tropism, the seedlings grow towards the light. I simply flip the trays around, and they start growing the other way.
Once the tomato seeds have germinated, I will remove the dome cover. I tend to keep my seedlings on the cooler side, which slows down growth, but indoors, that is what I want. I haven't yet set up my lights, but will have to do so shortly. It doesn't take long for tomatoes to germinate, and as soon as they do, you want to have them under as mush intense light for as long as possible. I will post a pic of my set up as soon as I get it going.
This is my little pre-Christmas Galina's Yellow experiment. She is doing very well. Notice how thick the stem is, and all the side shoots. I probably should give her a trim. But a pretty happy little tomato plant.
Galina's flowers mean I may get a little tomato sometime in the near future. Here's hoping!
Wednesday, March 19, 2008
Book Recommendation
Just a quick post right now.
A friend of mine just lent me an excellent book on gardening with kids.
Roots, Shoots, Buckets & Boots (Activities To Do in the Garden) by Sharon Lovejoy.
It's a really cute little book, with some really good info and ideas, for beginners and seasoned gardeners alike. I quickly read through it this morning, and I'm going to put it on my list for books to look for. I think my kids will get a kick out of some of the ideas, especially the 'Three Sisters', an Iroquois traditional planting combination, which consists of planting blocks of corn, beans and squash together. Lots of other cute little ideas, and the author has a good grasp on what works with kids to get and keep their attention, which most of us parents know can be difficult.
Monday, March 17, 2008
Stuck In A Rut
I seem to be, and literally was earlier today, stuck in a rut. Just glad I have snow tires on my van, so I could finally jostle my way out of the huge ruts of snowy, slushy ice that cover my neighborhood streets. I have not started my major tomato ops yet, because I am waiting for a final seed order and a final trade to arrive, and because I really did have to wait. There is not much point in putting all this effort into starting and growing all these tomato babies too early. It really doesn't give you any advantages. And with the almost record breaking snowfalls we've been getting, my low tunnels are looking like a pipe dream right now.
I think I may start some tomorrow.
I found some cheap greenhouse starter trays at Canadian Tire, I cleared off the top shelf of one of my greenhouse shelfy thingies, so there is no reason not too. And, it's St. Patrick's Day today. I like having a specific day for gardening dates. I usually plant out on the 2-4 weekend (Victoria Day), near the end of May, although I really should wait till the beginning of June. But I always figure what's a week or two? Then some nights you would catch me running around with sheet and tarps, trying to cover everything because of frost warnings!! But starting the day after St. Patty's has a nice ring to it!
And yes, I do have tons of trays and pots in the shed, but I can't get to it right now, because of all the snow. That's okay, they'll still come in use later on when I transplant the 'for sale' seedlings up to the larger pots. These mini trays that I bought will hold 36 plant babies each, and that would make the indoor/outdoor trek during nice weather much easier. Last year, it took what seemed like forever to lug everything outside in the morning, and back in for bedtime. I was also lugging in and out the brugs, so it was quite a bit of work.
I recently ordered a few more seeds, and was sorely disappointed when I found out that they had run out of two that I really wanted to try this year, Paul Robeson and Black from Tula. Of course, I'd forgotten that I'd wanted to try them, desperately, until I was smugly looking through the catalog, thinking to myself I have everything that I need. Note to self ---never be smug when looking through seed catalogs!! It always, always leads to garden lust. For some of us, looking through them is akin to garden porn. Like the smug reformed non-smoker, it just takes one! One tomato that you remember people raved about, and all of sudden you're off the wagon. And you can't stop at one, because now that you've truly fallen off, you may as well go whole hog!
I also ordered some snow peas, and some asparagus. I managed to kill my asparagus patches last year, the ones that I had grown from seed and so carefully tended to for the past 4 years. It takes 3 -4 years from seed to get a big enough patch that you can harvest from, and last year would have been the year! So here I go again. Did I mention that asparagus is one of the few vegetables that I truly enjoy?? Besides potatoes, of course. I would take asparagus over any other vegetable, I even love raw asparagus. And no, it is not because of my childish delight in the green pee that eating it causes!
Asparagus is not completely cold hardy here, and some extra protection during the winter is advised. Of course, I didn't think raised beds = less protection during the winter. And we had a very cold winter last year, and very little snowfall. So they froze to death, partly due to the lack of snow cover, and mostly because of my own stupidity. Live and learn. But now I'll have to wait another 4 years before I get to harvest a decent amount.
(PS If anyone wants to send me just a few seeds of Black from Tula, or Paul Robeson, I wouldn't say no. And I might have some seeds you would like, in exchange!)
Saturday, March 8, 2008
Pest Patrol
I have a problem with aphids indoors, ever year. They simply adore brugs, and will quickly jump to the tomatoes and peppers and set up shop there. I haven't found any way of eradicating them, but I do manage to control them with a pretty simple solution of dish soap, alcohol and water. Smaller plants get baths in the kitchen sink or the bath tub, the larger 5-6 footers get spot treatments. I spray the soapy water all over the leaves, letting them stand for about 10 minutes, then shower them off, using my fingers to remove bugs from the stems. I also try to keep my brugs fairly defoliated over the winter, to eliminate some of the aphid habitat. But now that the light levels are finally picking up, the brugs are starting to wake up, and I don't want to keep stripping the leaves off. I've even got a flower open on a noid white, and buds forming on a peach Candida, which I know I should be picking off, but this time of year, I'll take what I can get in the way of flowers.
Once everything goes outside, the aphids sees to melt away. I will blast the plants with the hose a few times when they first go outside, but after that, Mother Nature sends in her garden helpers, and the problem seems to just go away. I don't use chemicals in my garden (unless you classify beer as a chemical), so that may be beneficial to the insects that help control aphids and other pests, such as ladybugs. I have used beer as bait for the slugs who like to eat my hostas, but in the last few years I haven't bothered, because they don't seem to be doing as much damage anymore. I'm not sure why that is.
Potato beetles are another problem particular to my brugs. I guess because they are in the Solanaceae family, they are very attractive to a potato beetle. It's odd, because I've never caught the beetle on potatoes or tomatoes, only my brugs. They don't do to much damage, because I'm pretty quick to spot them and their bright orange eggs. They are dispatched immediately in the same soapy water that the Lily beetle takes its swan dive in.
And that is another garden pest that I really can't stand. Those things are pretty as adults, but absolutely gross as larvae. They literally cover themselves in their own excrement, therefore have very few (if any) predators. I don't have a lot of lillies, but the ones I do get attacked every year. I wear plastic surgical gloves for their removal. Adults get tossed into a soapy bucket of water, along with the larvae, which are scraped off with sticks. Even with gloves on, I can't bring myself to touch them.
There are many other pests in the garden. This is just a short list for tonight. And I will admit, I am selective about what I consider a pest. I've found the beautiful green and white striped yellow dotted caterpillars of the Black SwallowTails devouring my dills. I decided I don't like dill that much, and if I need it, I can always buy some or grow some more. So I let them be.
I like to think I make Karma smile sometimes!!
Ain't she purty? And she smells as good as she looks.
Once everything goes outside, the aphids sees to melt away. I will blast the plants with the hose a few times when they first go outside, but after that, Mother Nature sends in her garden helpers, and the problem seems to just go away. I don't use chemicals in my garden (unless you classify beer as a chemical), so that may be beneficial to the insects that help control aphids and other pests, such as ladybugs. I have used beer as bait for the slugs who like to eat my hostas, but in the last few years I haven't bothered, because they don't seem to be doing as much damage anymore. I'm not sure why that is.
Potato beetles are another problem particular to my brugs. I guess because they are in the Solanaceae family, they are very attractive to a potato beetle. It's odd, because I've never caught the beetle on potatoes or tomatoes, only my brugs. They don't do to much damage, because I'm pretty quick to spot them and their bright orange eggs. They are dispatched immediately in the same soapy water that the Lily beetle takes its swan dive in.
And that is another garden pest that I really can't stand. Those things are pretty as adults, but absolutely gross as larvae. They literally cover themselves in their own excrement, therefore have very few (if any) predators. I don't have a lot of lillies, but the ones I do get attacked every year. I wear plastic surgical gloves for their removal. Adults get tossed into a soapy bucket of water, along with the larvae, which are scraped off with sticks. Even with gloves on, I can't bring myself to touch them.
There are many other pests in the garden. This is just a short list for tonight. And I will admit, I am selective about what I consider a pest. I've found the beautiful green and white striped yellow dotted caterpillars of the Black SwallowTails devouring my dills. I decided I don't like dill that much, and if I need it, I can always buy some or grow some more. So I let them be.
I like to think I make Karma smile sometimes!!
Thursday, March 6, 2008
Starting Datura Seeds
I started some Datura the other day, and thought I should post about it. Datura's are very easy to grow, are related to Brugmansia, and very beautiful as well. They don't require as much care, don't mind poorer, dryer conditions, and are pretty much problem free. They are also very poisonous, and every year, someone tells me that I shouldn't grow them. My advice to them? Don't bloody eat them!!! They have been used by Shaman for ceremonial purposes, and once in a while, a story about dumb teenagers will surface, and then people want to blame the plant, or the grower. I think perhaps it is just natural selection at work! We have many poisonous plants and substances all over the place, some much worse than Datura. Don't put them in your mouth, and wash your hands well after working with them. That goes for brugs, as well.
I found these trays on recycling day, and they are perfect for starting Datura. I should be able to keep them growing and avoid having to repot/transplant until they go in the garden. Soaking the seeds overnight in warm water before planting will gives me much quicker and better germination. I plant the seeds about 1/4 inch deep in the soil, and keep the tray in a nice warm spot till I see their little green heads popping up. Then I keep the tray in a bright sunny location and give them a quarter turn every day to help them grow straight. I don't use lights on them, because I don't have enough to go around, and they seem to do alright with the amount of sunlight they get.
This is a double purple, about to open.
I am also growing triple yellow, triple purple and the plain white D. inoxia. They are all quite pretty, and attract lots of attention. I treat them as an annual, and grow them from seeds every year. You can dig them up in the fall, but they don't do very well inside for me. Not enough light for them, and the air is probably just to dry inside. They grow so quickly from seed, it's not really worth the bother, for me anyway. The D. inoxia will easily reach four to five feet high and wide in one summer, the others are slightly smaller in my garden.
For more information on Brugs and Dats, check out the links. There is an excellent book with stunningly beautiful photographs by Ulrike and Hans-George Preissel, 'Brugmansia and Datura - Angel's Trumpets and Thorn Apples'. A must for any enthusiast, and guaranteed to make you drool!! I highly recommend it.
Saturday, March 1, 2008
Saving Seeds
I'm gonna jump off track here and skip ahead to saving seeds. I was going through my seed inventory, and realized that I have just over 50 varieties of tomatoes now. To some that may seem like a lot, and to others, a piddling amount. Almost half are from the plants that I grew last year and saved seed from, so I decided that was my next topic.
Saving seeds is very simple, but if you really want to be sure that you have a pure strain, and that no cross pollination has occurred, then you have to start the process before the flower on the tomato plants are even open. Cross pollination occurs when one variety is pollinated by another. Most of our varieties are the results of natural crosses, usually done by insects, which have over time become 'stable'. Hybrids are the result of man-made crosses. The offspring of such a cross is an F1 (first generation), and that is what you are buying when you buy a hybrid. You can save the seeds from an F1, which would be F2 (second generation), but you won't get the same plant as the original F1, which is not to say you may not get a nice tomato out of it. And experimenting can be fun. It can get pretty technical, and there's a lot of interesting information out there about tomato breeding, stabilizing hybrid offspring, trying to grow the parents back out, etc, but that's not where I was going with this.
There are a couple ways to ensure the tomato seeds will be pure. Bagging blossoms, maintaining isolation distances, or if you're not interested in saving seeds, but want certain varieties, then make sure you buy from a reputable seller. There are also many traders out there, who take it pretty seriously, and folks who only want to ensure these varieties keep growing, who will give away seeds for the price of a stamp! They are serious about this endeavor, and will most likely have done the work to ensure pure seeds.
Bagging blossoms is your best bet whether you are growing a small or large variety of OP's. You simply cover the flowers before they open, using a light weight material such as cut up nylon from stockings, or tulle. It basically provides a physical barrier to prevent any insects or wind blown pollen coming in contact with the flowers. Giving the flowers a gentle shake is a good idea. Tomatoes are self pollinating, having perfect flowers, which means they contain both the male and female part of the flower. They do need pollen in order to form fruit, but they provide it themselves. Once they have start to form the fruit, remove the bag and identify those particular ones with string or warn, so that you remember to harvest the seeds from those tomatoes. As a home gardener, you don't need a huge amount of saved seed, so a few tomatoes should provide you with enough seed.
So now we'll assume you have the tomatoes that you want to save the seeds from in hand. You chopped them in half and squished out the seeds. They are covered in a gelatinous goo, and you will need to ferment them in order to remove it, which also help in removing any pathogens or bacteria. I use a small kitchen glass, add the seeds and a bit of water, give it a stir and put it on my kitchen windowsill. It only take a day or two, stirred once or twice a day, and they should be done. You don't want to leave them too long, or they may end up sprouting in the water and then they are no good at all. Most of the seed will have sunk to the bottom of the glass. Strain them in a tea strainer, or similar, giving them a really good rinse. Then simply dump them out on a paper towel, fold it up and leave it out to dry. Make sure you label the paper towel, because you will forget what variety they are in a week or two, if you have more than one type on the go. Once they are completely dry, pack them away in a cool dark place. Voila, you have seeds for next year.
Subscribe to:
Posts (Atom)