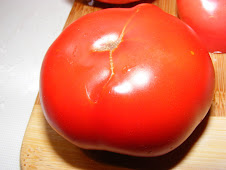
Promised more tomato talk, so I'll start with some of thing that can go wrong with the new little seedlings. A lot of these tips apply to other veggies/plants too, not just tomatoes. This is just a partial list. I will try to add other when I think of them.
1.Dampening Off
This is one of the biggest problems, and probably one of the easiest ones to avoid. The seedlings appear to wilt, and the stems weaken. It is caused by fungi that is present in the soil which attacks the seeds before they germinate or shortly there after. The fungus thrives in the same conditions that the seeds need for germination, but excess moisture will exacerbate the problem. Many growers will advise using a soil-less mix, to avoid it. I've never done so, and never had a problem. Good air circulation is helpful, even if you need to set up a fan in front of the seedlings. There are products on the market specifically to kill off the fungi that cause dampening off, and I've heard positive results from people using chamomile tea when they water the seedlings. I think the best idea is to try to avoid the problem in the first place. Over-watering and poor air circulation seem to be the biggest trigger for this problem.
2.Over-watering or Killing Your Plants With Kindness part A
This is also a big problem for many growers. It is so hard to restrain yourself sometimes, you just want these little seedling to grow! But drowning your little seedlings is a sad way to end your growing attempt. Whether they are in small trays, or larger pots, the strength of the light and the indoor temperature will determine when and how much to water. Smaller containers will dry out much quicker than the larger ones. A good rule of thumb is to let the plant tell you. If they refuse to talk, then look closely at the soil, and the plants themselves. Smaller seedlings need more care, and should not be allowed to dry out completely. Once the seedlings are larger, and have several sets of true leaves, then a bit of stressing by underwatering is not a bad thing. The soil should be almost dry, and the plants should be almost wilting. It actually mimics what the conditions in the garden will be, and can toughen them up, or so the theory goes.
Part B
Over-fertilizing.
Generally, your seedlings will not require fertilizer, at least mot for the first little while. Check your growing medium before you decide. Are you using a seed starting mix? These will usually contain enough nutrients in the soil until the plants are ready to go out in the garden full-time. If you make your own mix, did you use compost or soil? If the plants look healthy and deep green, then I would skip the fertilizing. If they appear to be turning slightly yellow tinged, or if you started them way before the recommend 6 weeks, then you may need to reach for some food. Check out the organic options, even my local Canadian Tire carries a wide variety of product now, and generally the prices are comparable to the standard 'blue water'. --Miracle Grow--You can even make your own compost teas, if you have it on hand.
3. Lack of Light
For indoor growing, this can be problematic for many. As soon as those seedling emerge, they need all the light they can get. You can buy fancy lights, but I would not bother wasting the money. A simple shop light with fluorescent bulbs does the trick for me. I also use a couple of those fluorescent stick lights, and a couple of the hand held lights suspended above the seedlings. The lights should be as close to the tops as possible. Fluorescent shouldn't burn them, but if you're using other types, then just be careful to keep on eye on them. You may need to rotate the trays around, especially if they are in a window as well as under lights. You will find the seedling stretch towards the light, so to encourage straighter upwards growth, adjusting the light source and moving the trays around is your best bet. When they get transplanted, or go into the garden, I bury the stem quite a bit anyway so a little legginess is okay. Tomatoes will form roots along the stem that is buried, giving them a stronger root system so it's not the worst thing.
That's about it for tonight. One final note, I've found some really neat looking hoop cover kits at Lee Valley. I'm mighty tempted. I'm not sure how much of a head start that would give me in the garden, but I'd guess if the weather co-operated, and I incorporated some heating ideas of my own, I might be able to push a good three to four weeks ahead of schedule. That would mean planting out in the beginning to middle of May, instead of June. And that would mean I could be starting tomatoes pretty soon. That's such a nice thought when it's -15 outside tonight. Spring is nearly here! And I'll be waiting, open armed with plenty of tomato plants behind me!
Showing posts with label seed starting. Show all posts
Showing posts with label seed starting. Show all posts
Friday, February 8, 2008

Monday, January 21, 2008
Starting from Scratch......or Seed - Part One

It's a tad early for starting seeds of anything yet unless your trying your hand at wintersowing, but I really start to get itchy fingers near the end of January. I don't start tomatoes until late March or Mid April, 6-8 weeks before my last frost date. So I decided perhaps if I write about it, that may scratch the itch for a little bit. And what else would come after choosing your tomatoes? Besides waiting for the seeds in the mail, that is.
I do have one little Galina happily growing in a pot under a lamp light, sitting right beside my desk on a shelf . I must check on her at least 5 times a day. Spring really can't come fast enough!
Starting your own tomatoes from seed is pretty straightforward. The three first key ingredients for germination are soil, water and heat. And once they've popped their noses out (germination), the fourth key is light. There are all kinds of fancy set-ups you can buy, and if you're creative, you can make some pretty slick outfits yourself. But whether you're growing a few plants for yourself, or a few hundred, you don't need to spend a lot of time or money. When I get my set up out of the shed, and actually working, I'll be sure to post some pictures. It's pretty simple and didn't cost me much.
What type of container you start your seeds in is entirely up to you and would also depend on how many you plan to start. I use the plastic cell packs that fit perfectly into the nursery trays, but small pots, even styrofoam cups are perfectly fine if you're not going to start that many. I start them off in the cells, and once they have a true set of leaves (or to be honest, probably longer), I pot them up into larger 4 inch pots. I start a few hundred plants, though, so for me this is the easiest way. And I am obsessive about checking them a few times a day, at least. If you are not the type of person who obsesses over plants, a larger starting container might be better, because they will not dry out as quickly.
So now for the soil. You can buy perfectly fine, very expensive seed starting mix, or you can make your own. Guess which one I do?
Of course I make my own. It's part of the fun! I use regular black earth (cheap at Canadian Tire, or other stores), vermiculite, perlite and peat moss. The ratio is approximately 1/2 earth, 1/6 each vermiculite, perlite, and peat moss. I kind of eyeball it, don't bother measuring it out. If I have good compost around, I'll add some of that too. I mix it all up in a big bucket, and then fill up the cell packs. Now water the mix in the cells, making sure it doesn't get too wet. If that happens, just let it dry out a few days before you plant the seeds. Now I'm ready to plant!
We'll get to that next time!
Subscribe to:
Posts (Atom)